6 Essential Steps on How to Build a Thriving Community From Scratch
Between refining your product, securing funding, and everything else on your plate, the idea of building a community might seem like an overwhelming addition to your already full schedule.
However, creating a strong community around your startup can be a powerful asset, providing you with the support and resources you need to navigate the complexities of entrepreneurship successfully.
We're here to tell you that building an online community doesn't have to be complicated. With the right approach and tools, you can simplify the process and create a thriving community that benefits you and your start-up or non-profit.
In this article, we'll guide you through the technicalities of the community-building process and share examples of successful communities to inspire and motivate you.
How to build your community in 6 steps
One key factor in simplifying the community-building process is choosing the right software. Instead of hiring a development team and spending more resources, you can make it on your own with a no code tool.
We'll show you how to do that using Bettermode, an all-in-one customer community platform. The best part is that you don't need coding skills. Bettermode offers templates that are easy to use and customize.
Follow these steps to build a thriving online community, and you can share it with the potential members by the end of the day!
Step 1: Create a Bettermode account
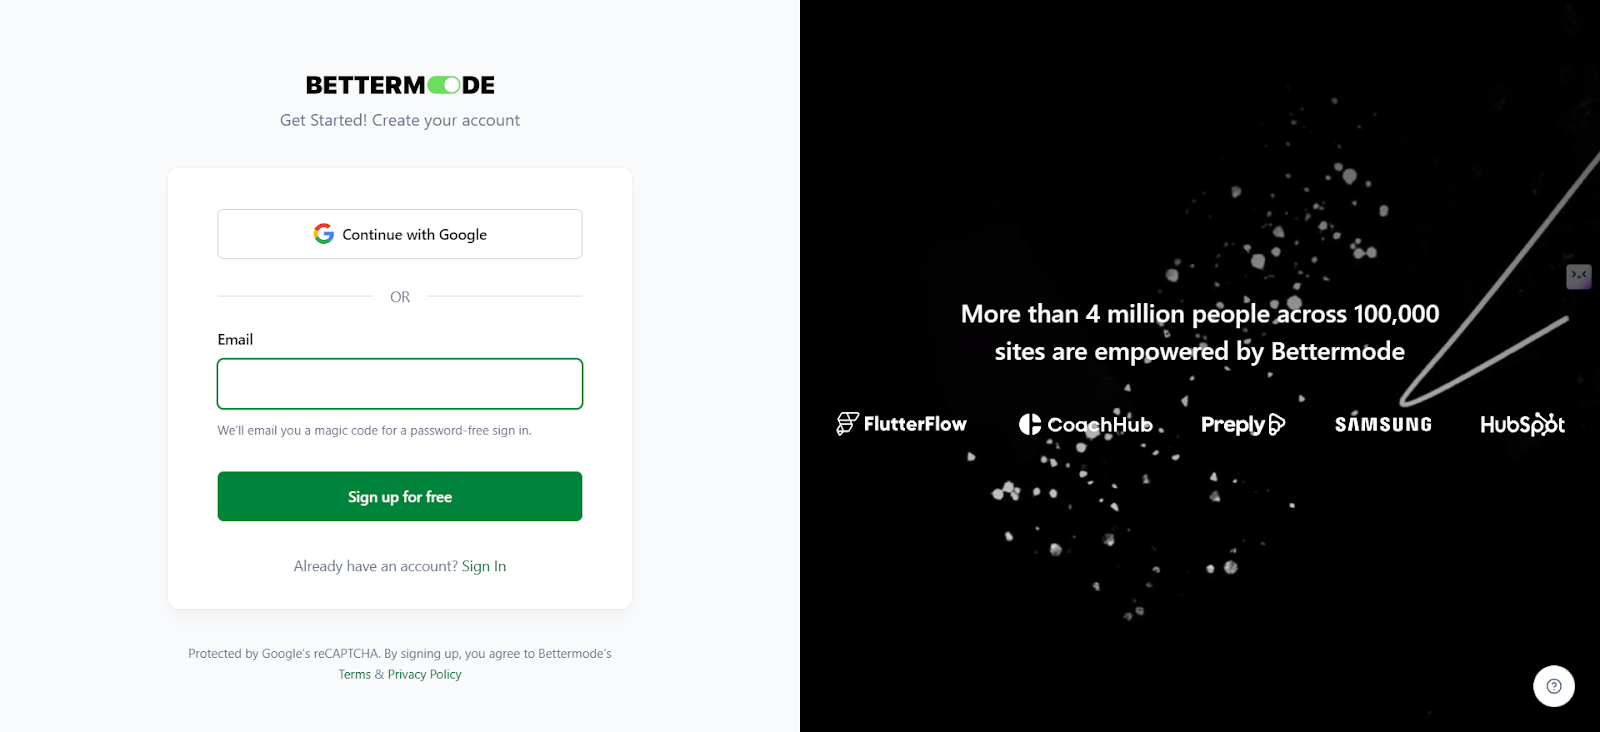
You can quickly create a Bettermode account (14-day free trial) using your email or, even easier, Google login. We don't ask you to leave your credit card credentials, so you can explore Bettermode's features and templates without any upfront cost.
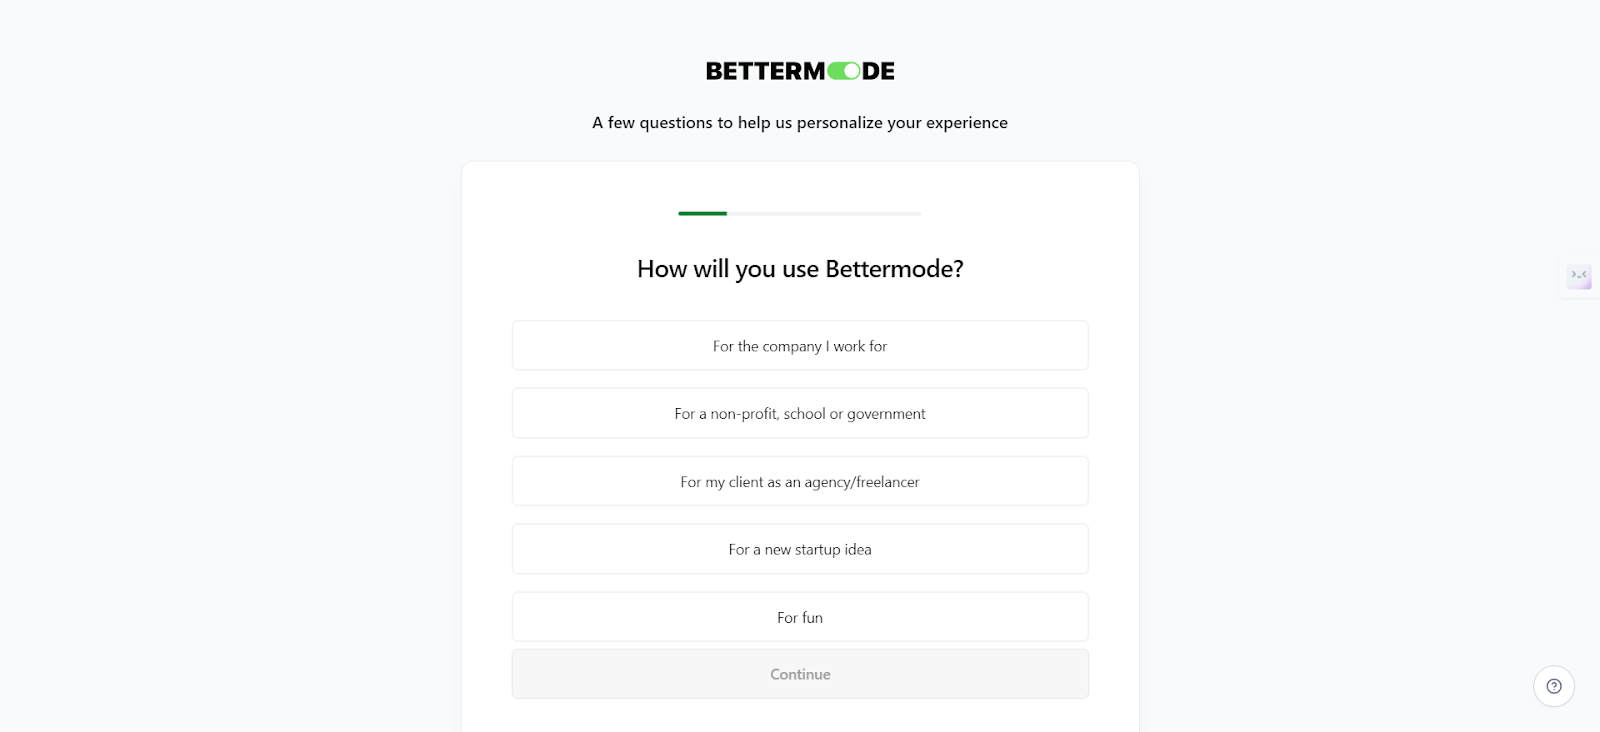
When you sign-up, we will ask you a couple of questions that will steal just a few seconds of your time.
After that, you will be redirected to our dashboard, where you can start building community. You'll see a few template suggestions and each one of them has a specific purpose. You can use them the create a forum, social network website or creative hub, for instance.
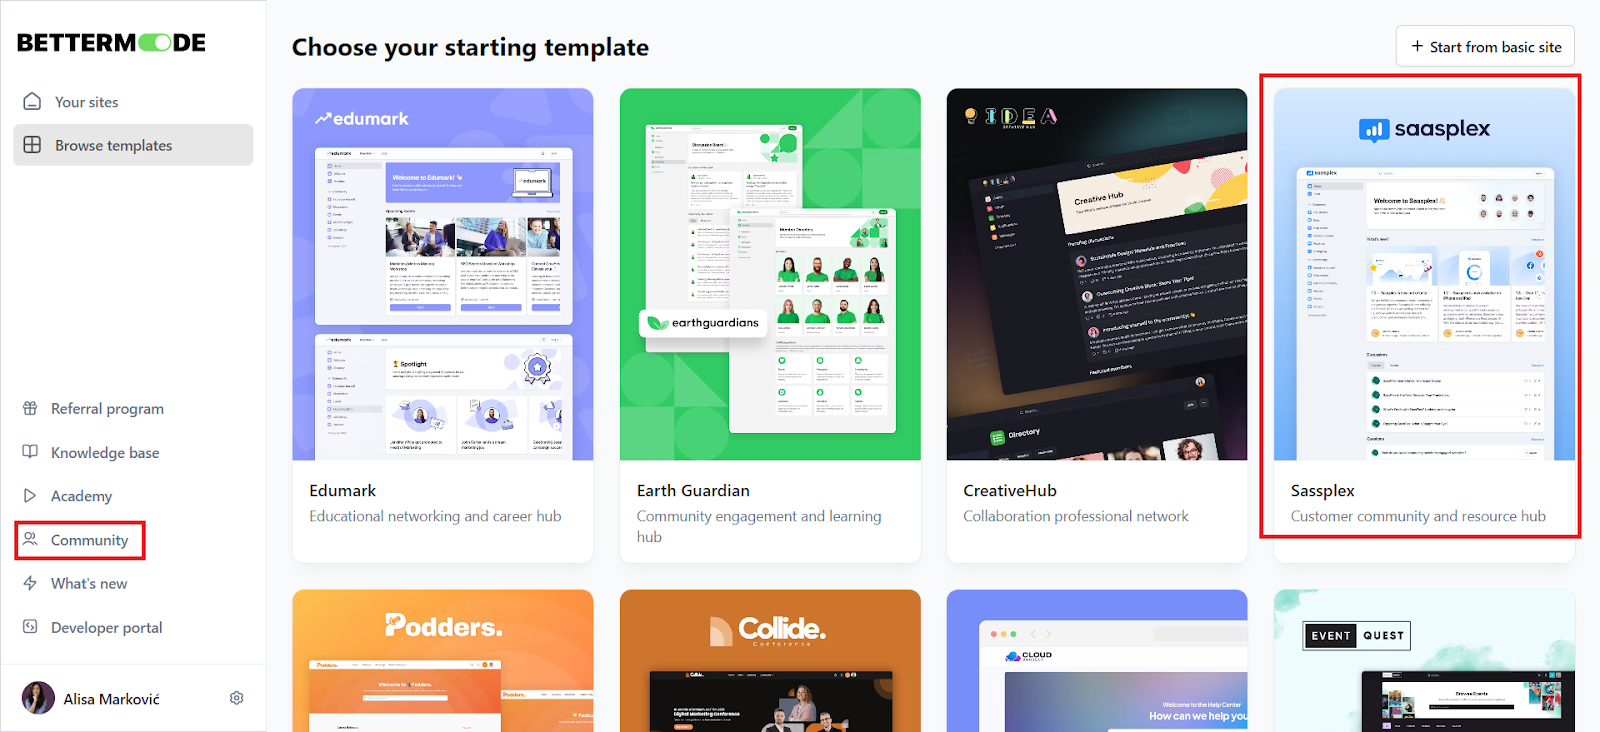
Step 2: Choose the Saasplex template
Creating a thriving community can be a complex task with many details to focus on, but not if you have a template that you can customize. The Saasplex template makes this much easier for you.
It is fully customizable, and with its own content management system (CMS), interactive forum and discussion boards, you can easily create and manage your online community without any coding skills required.
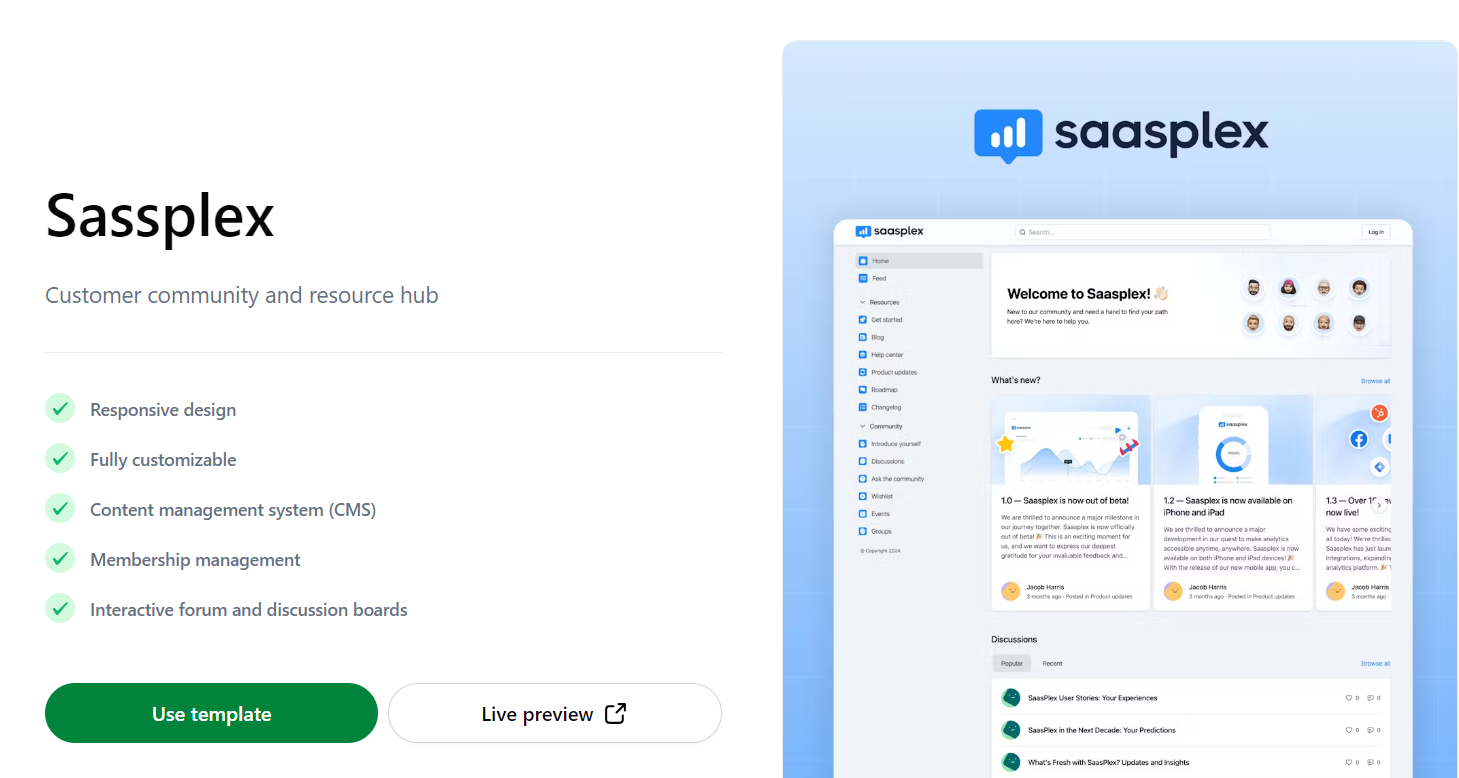
You can see how your community will look before you start customizing it by clicking on "Live preview". To start working on it, simply click on "Use template".
.png)
Step 3: Customize the online community template
Now it's time to start creating your community. Before you begin adding any content, take a few minutes to focus on details such as Appearance (logo, themes, typographies, styles) and setting up your brand colors and other details in the Design Studio.
To access those settings, you need to click on your picture in the top right corner and select "Administration" from the dropdown menu.
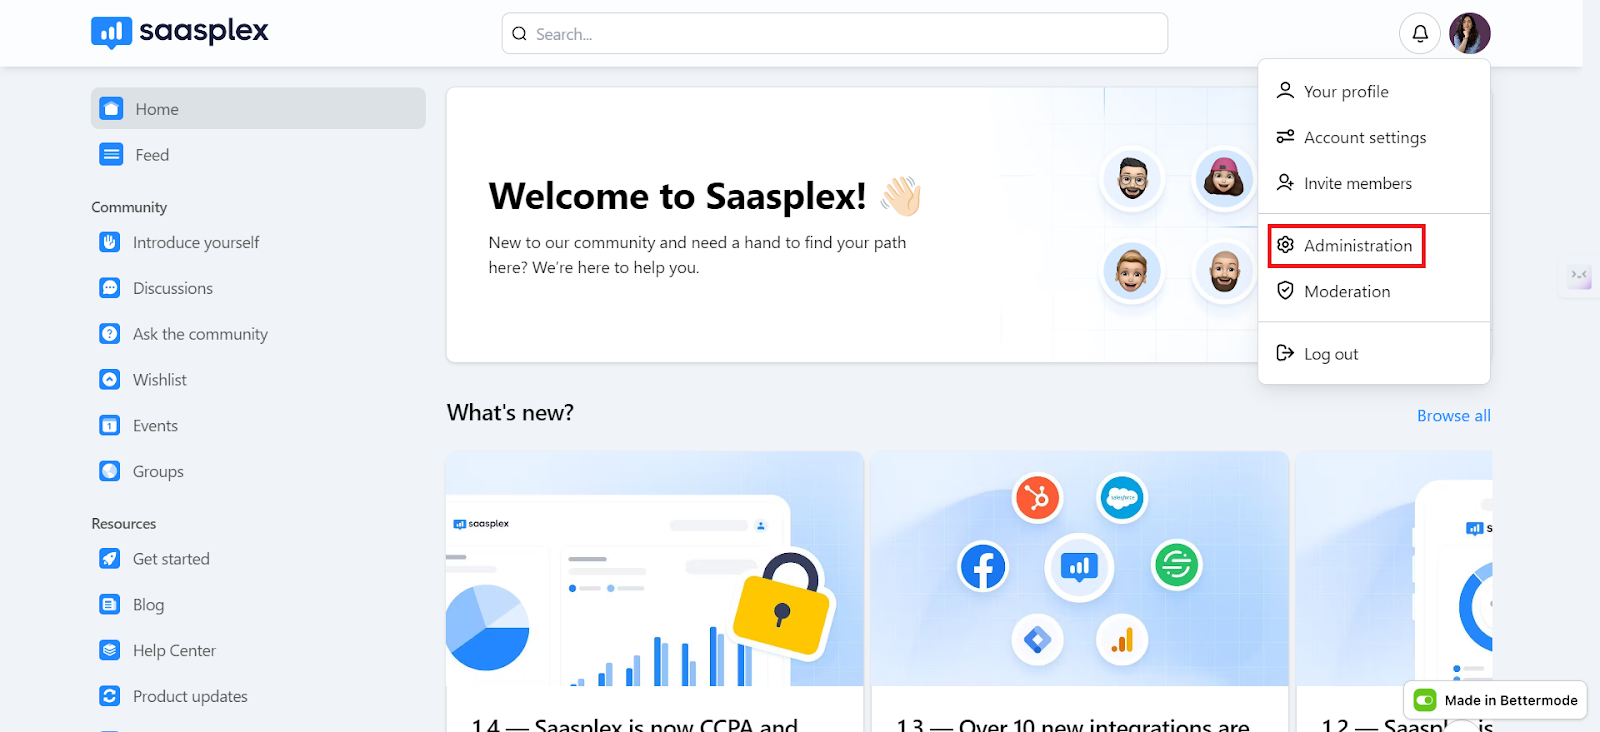
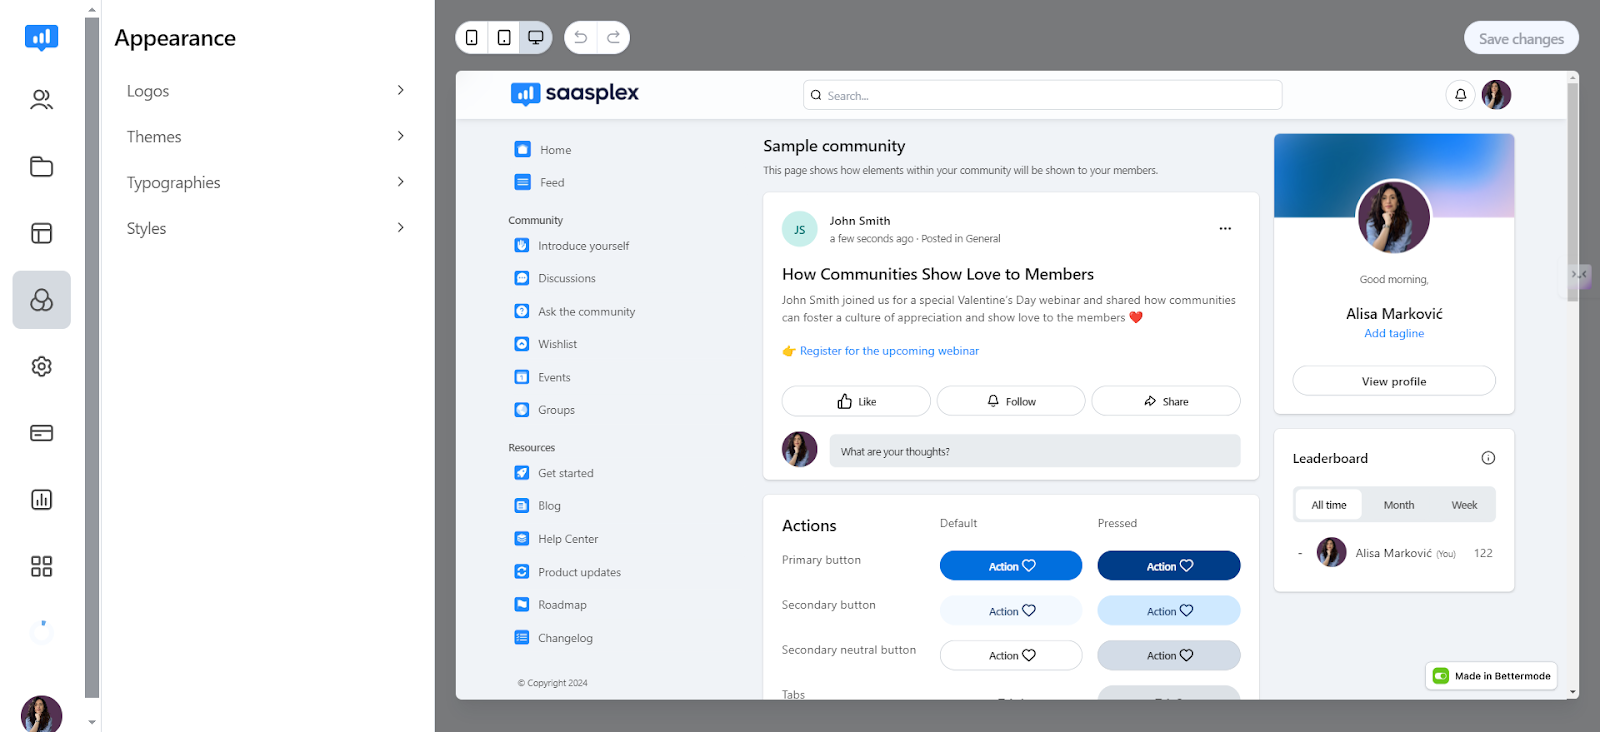
Now the web app builder has opened, and on the left side, you'll see a horizontal menu with various categories for settings. We'll start with Appearance.
Within this section, you can adjust the following:
- Logos: When you click on "Logos," you can upload your logo in both light and dark versions (light logo and dark logo). Make sure that the size of the logo is appropriate so that it displays correctly in the header. For example, the recommended dimensions for a logo image are 600x80 pixels; for a square image, we recommend a size of 512x512 pixels.
- Themes: In the Themes section, you adjust your brand's colors. You can choose the main colour, and we will automatically adjust other theme elements accordingly. Additionally, you can choose a "Dual theme," or you can opt for either the light or dark theme exclusively.
- Typographies: You can choose from 10 different fonts, or you can select one of five font pairs that are compatible with each other.
- Styles: In this final section in the Appearance tab, you adjust how you want cards, inputs, and buttons to look. You can choose whether they will have sharp or rounded corners, for example.
After this, we move on to the "Design Studio," where you adjust these three items:
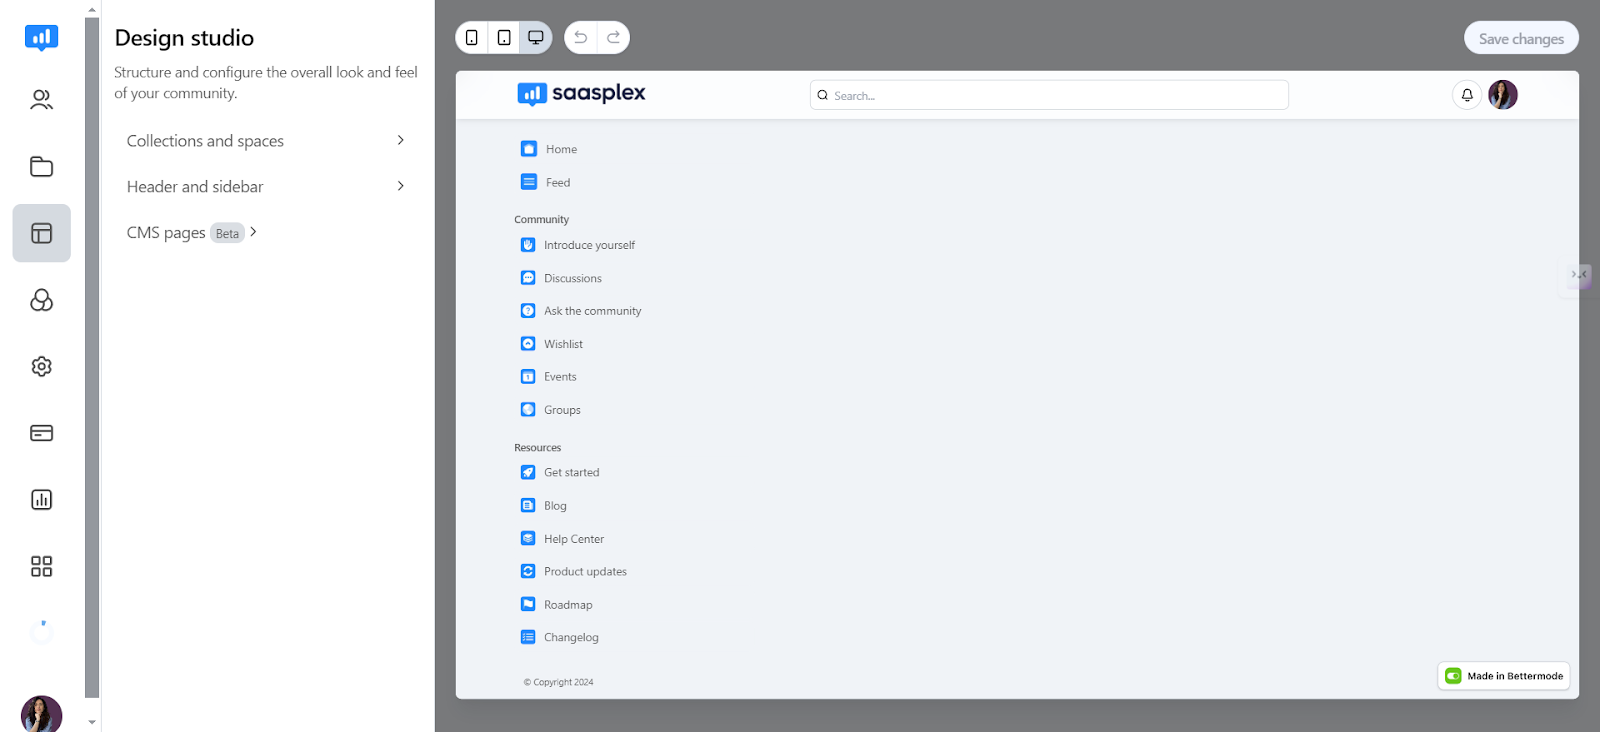
- Collections and spaces: In this section, you customize, add and delete collections and spaces that are part of your community. The template already includes several basic categories, each with specific spaces. If you find anything unnecessary, you can delete them and add a new one if it's not already part of the template.
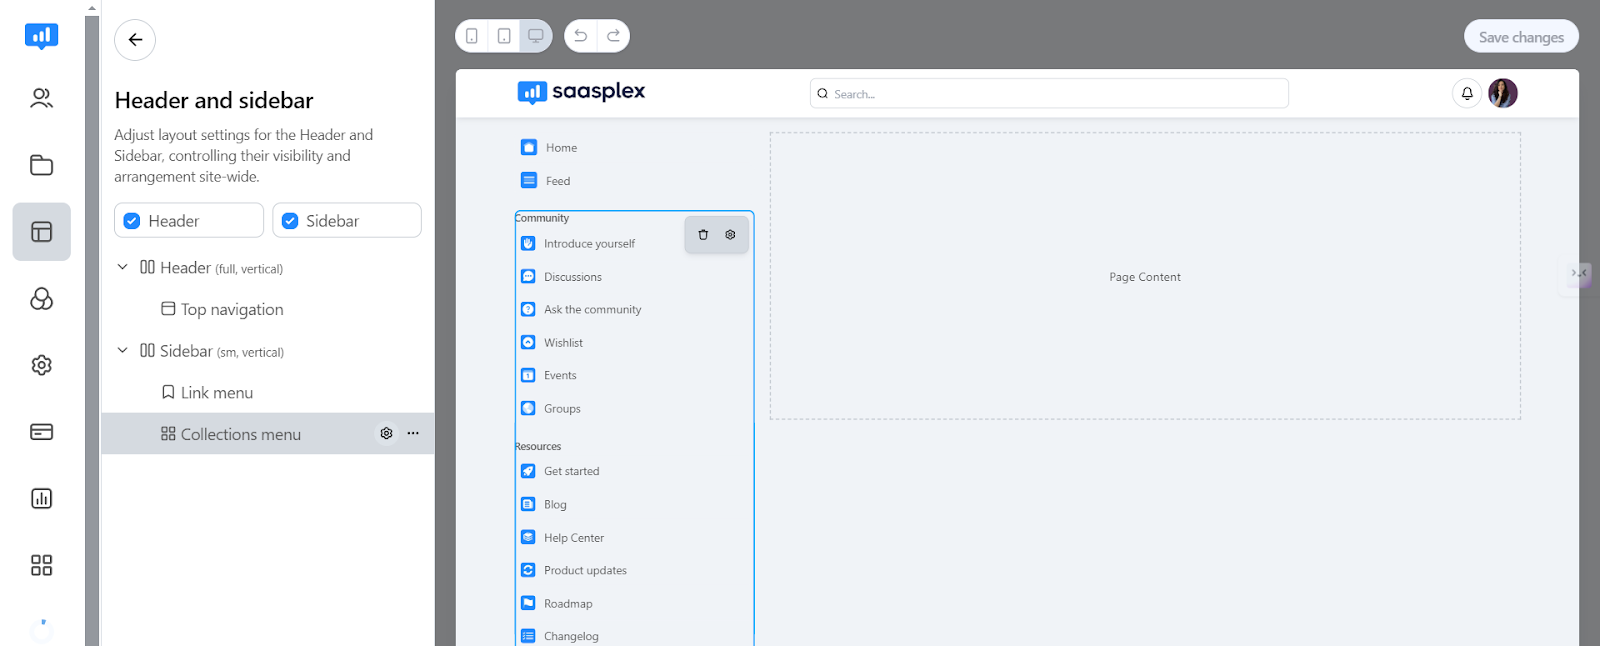
- Header and sidebar: Here, you can adjust how your header and sidebar look. For the header, you can display your logo, search bar, actions and menu, or you can disable some of these elements. Several presets are available, so you just need to pick what you like best. The sidebar is mostly divided into two parts: the link menu and the collections menu, and you can also organize it however you like.
- CMS pages: Here, you configure how certain types of posts within your community will appear, such as help center articles, questions, ideas, changelogs, events, etc. You can choose how specific elements (such as post banners or comment boxes) will look and disable some of them if you feel they are unnecessary.
Step 5: Create content
Now that you've set up all those details, it's time to enrich your community with some content. When you click on the second icon in the vertical menu on the left side of the screen, you'll see some pre-built sections (posts, spaces, tags and CMS).
In the main section, you'll see several examples of posts organized by specific Spaces. You've configured this according to your preferences beforehand.
To create a new post within a space, all you have to do is click on Add Post in the top right corner.
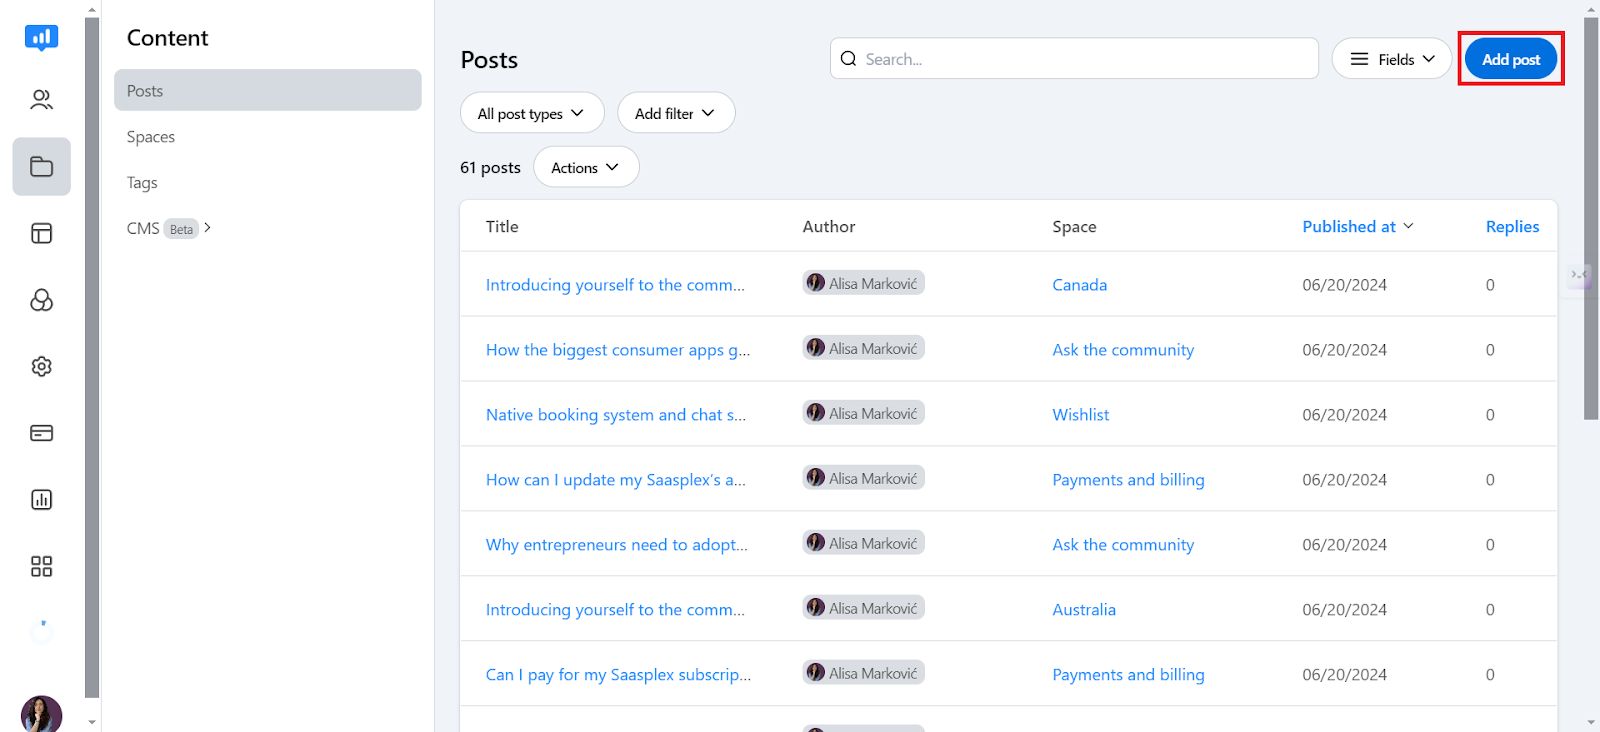
After that, you'll be prompted to choose which type of post you want to create:
Question post type
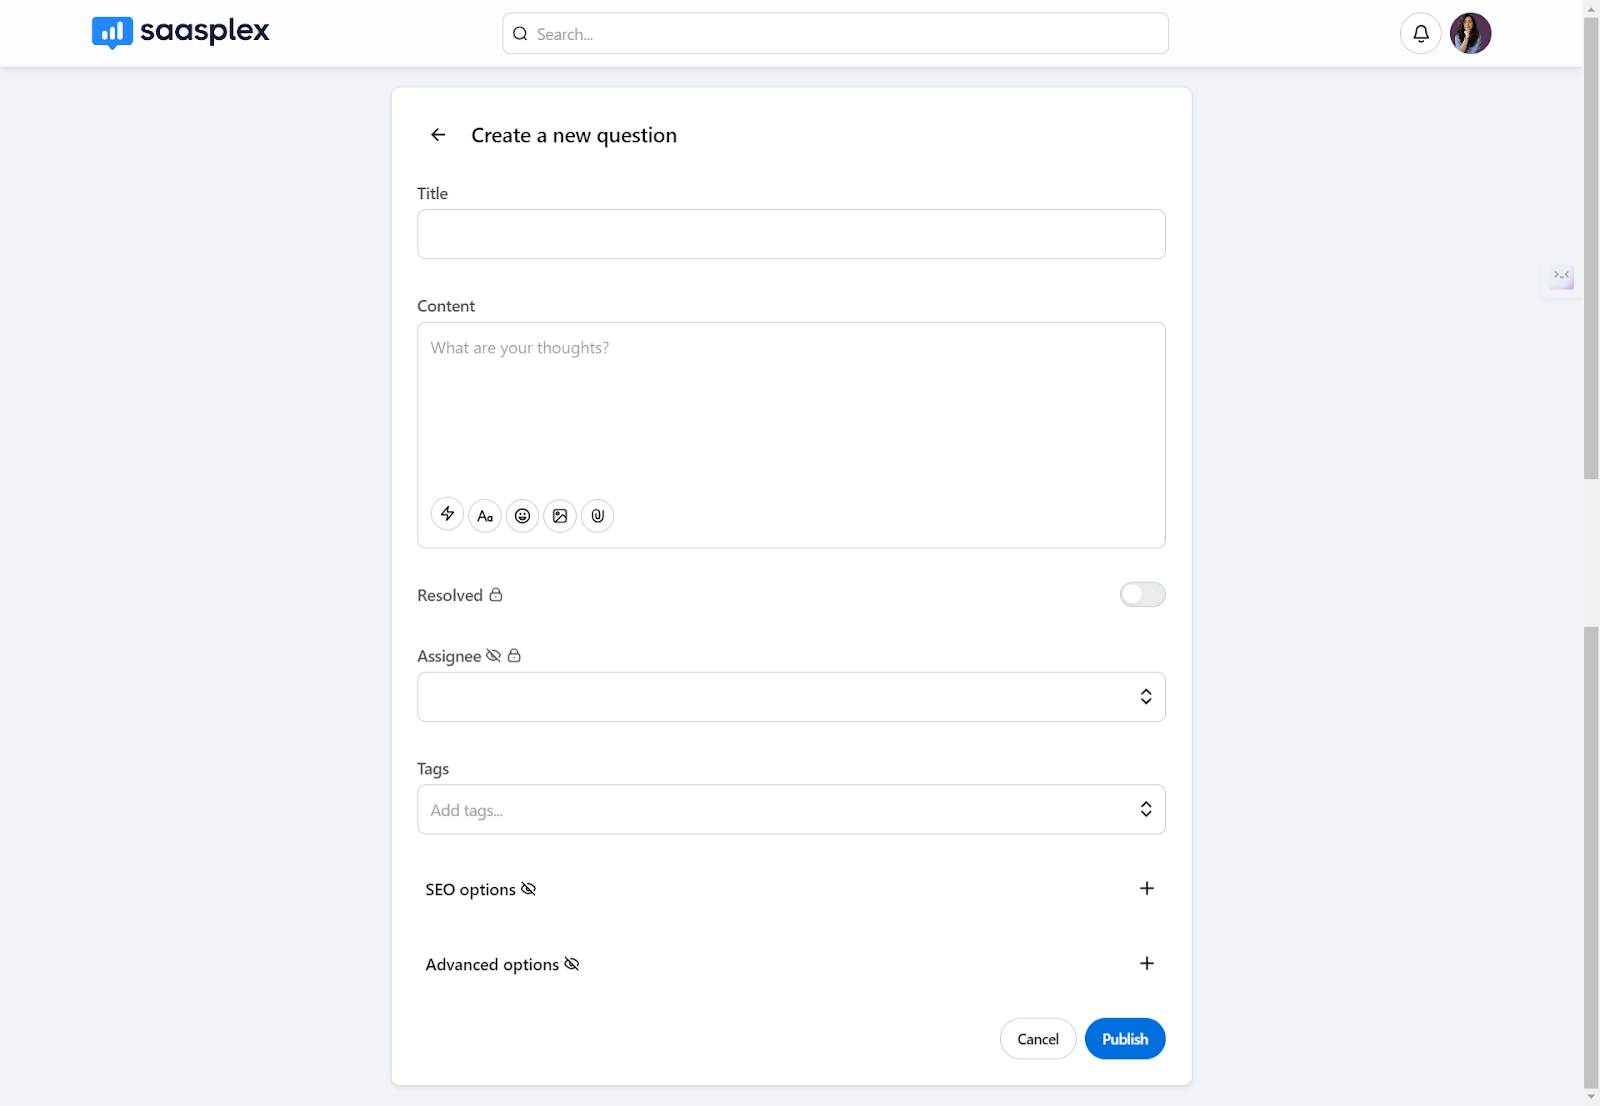
Question posts let community members submit their inquiries, which can be voted on by others. This helps identify the most pressing questions and ensures you're addressing what matters most to your online community. It's a fantastic way to uncover gaps in knowledge about your product or service, and members can chime in on their own experiences to provide valuable insights.
The post includes fields for:
- Title
- Content
- Assignee (visible only to admins)
- Toggle for marking questions as resolved or unresolved,
- Tags
Additionally, community members can enrich their posts with text, images, videos, audio and attachments using toolbar icons or slash commands.
Ideas post type
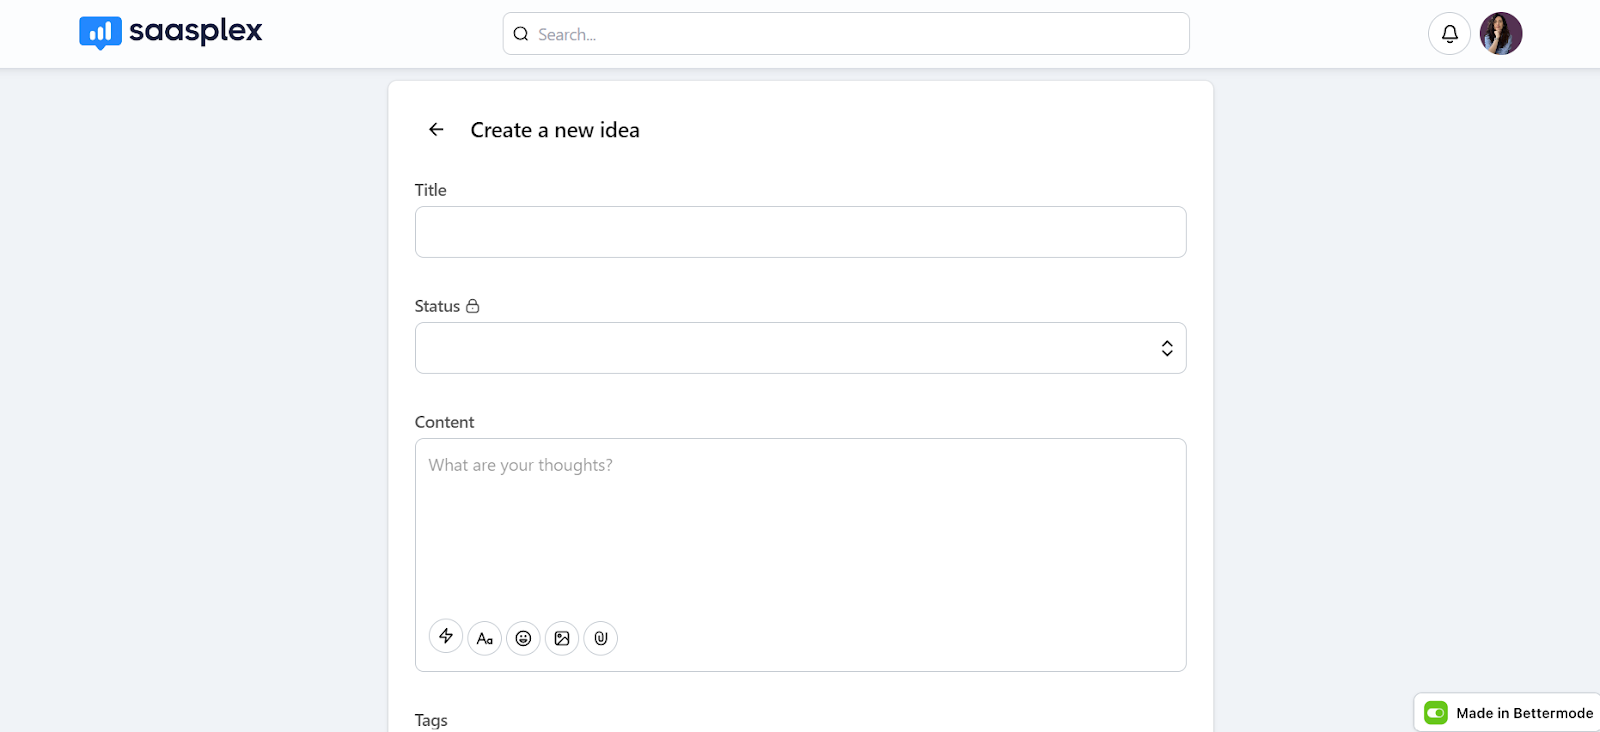
The Ideas post type is your direct line to member creativity. It lets them share their thoughts and suggestions for improvements, directly impacting the future of your product or service. This not only gives you valuable feedback but also empowers your members and makes them feel like part of the development process.
This type of post includes fields for:
- Title
- Type (only admins can update)
- Content
- Tags
- Status (only admins can update)
In the content field, users can add text, images, videos, audio, and attachments using toolbar icons or slash commands like:
- /image
- /video
- /audio
- /attachment
Members can also upvote and reply to ideas. Voting on ideas lets everyone show their support for the features or improvements they care about most. You can also reply to any idea to share your thoughts, ask questions or build on existing suggestions. Replies can be nested, making it easy to follow along with in-depth discussions.
Changelog post type
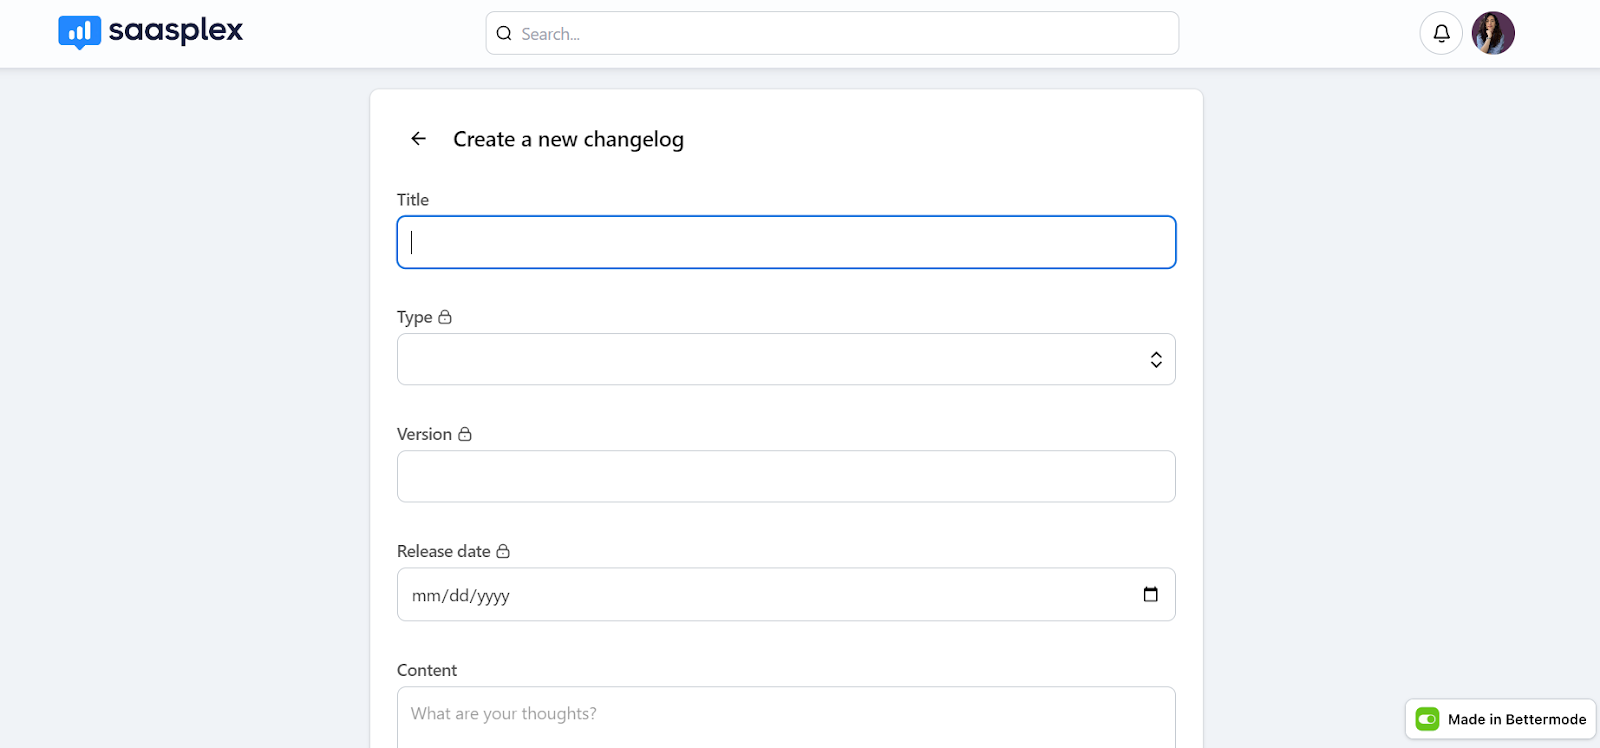
Changelog posts keep your community members up-to-speed on all the exciting new features, improvements and bug fixes you've made to your product or service. These posts include fields for:
- Title
- Content
- Type (such as new feature, improvement, or release notes)
- Version
- Release date
- Tags
Add some flair to your changelog updates with a variety of media. You can easily include:
- Text: Clearly explain the changes and their impact.
- Images: Showcase new features or improvements visually.
- Videos: Demonstrate how to use new features with short clips.
- Audio: Provide voice-overs for a more personal touch.
- Attachments: Share detailed information in documents or spreadsheets.
These changelog posts make sure members can easily stay informed. They'll quickly see what's new, improved or fixed, all in one place. Feel free to encourage your online community to react with emojis to share their feelings about the updates or leave a reply to discuss them.
Articles post type

Articles are your chance to share detailed breakdowns and explore ideas thoroughly. With a captivating cover image and up to 50,000 characters, you have plenty of space to craft informative and engaging pieces for your online community.
Just like other post types, you can add text, images, videos, audio and attachments to bring your articles to life. Use toolbar icons or simple slash commands (/image, /video, etc.).
Online community members can react with emojis to share their feelings and leave replies to build on their ideas. Nested replies allow for in-depth discussions and a truly interactive experience.
Events post type

With Events posts you can keep your brand community in the loop about upcoming and past events with eye-catching cover images, clear details like date, time and location. This makes sure exciting events don't get missed.
Members can easily respond to in-person or online events directly from your community. You can also include a custom web address for official sign-ups.
Events posts also let you highlight the people behind the scenes. Showcase the event hosts, especially if they're part of your community. It adds a personal touch and helps members connect with the faces behind the events.
Here's your rundown of all the fields you can use to create engaging Event posts:
- Title: Make it catchy and informative!
- Cover image: A picture is worth a thousand words - choose a visually stunning image that captures the event's essence.
- Date & time: Let everyone know exactly when the event happens.
- Location: Online or in-person? Clearly state where the event will occur (or the link to join virtually).
- Content field: Craft a compelling description using text, images, videos, audio and attachments.
- Hosts: Showcase the people behind the event, especially if they're from your thriving community.
- Event link: Direct members to the official sign-up page with a clear link.
- RSVP button: Make it easy for members to join with a clickable RSVP (Please respond) button.
Discussions post type

The Discussion post type is your go-to spot for sparking engaging conversations within your online community. Discussion posts are perfect for quick questions, brainstorming sessions, or just chatting with fellow members and community staff.
Unlike events and articles, discussion posts focus on the conversation itself. This post type keeps things straightforward – it's the perfect platform for members to:
- Ask questions: Get expert advice or hear from fellow community members.
- Share their thoughts: Voice their opinions and ideas on any topic.
- Connect with others: Engage in conversations and build relationships.
Here's what makes them interactive:
- Reactions: Express your feelings with a quick emoji reaction (6 options available!).
- Replies: Jump into existing discussions and share your perspective. Nested replies help keep conversations organized, even on complex topics.
Product updates post type
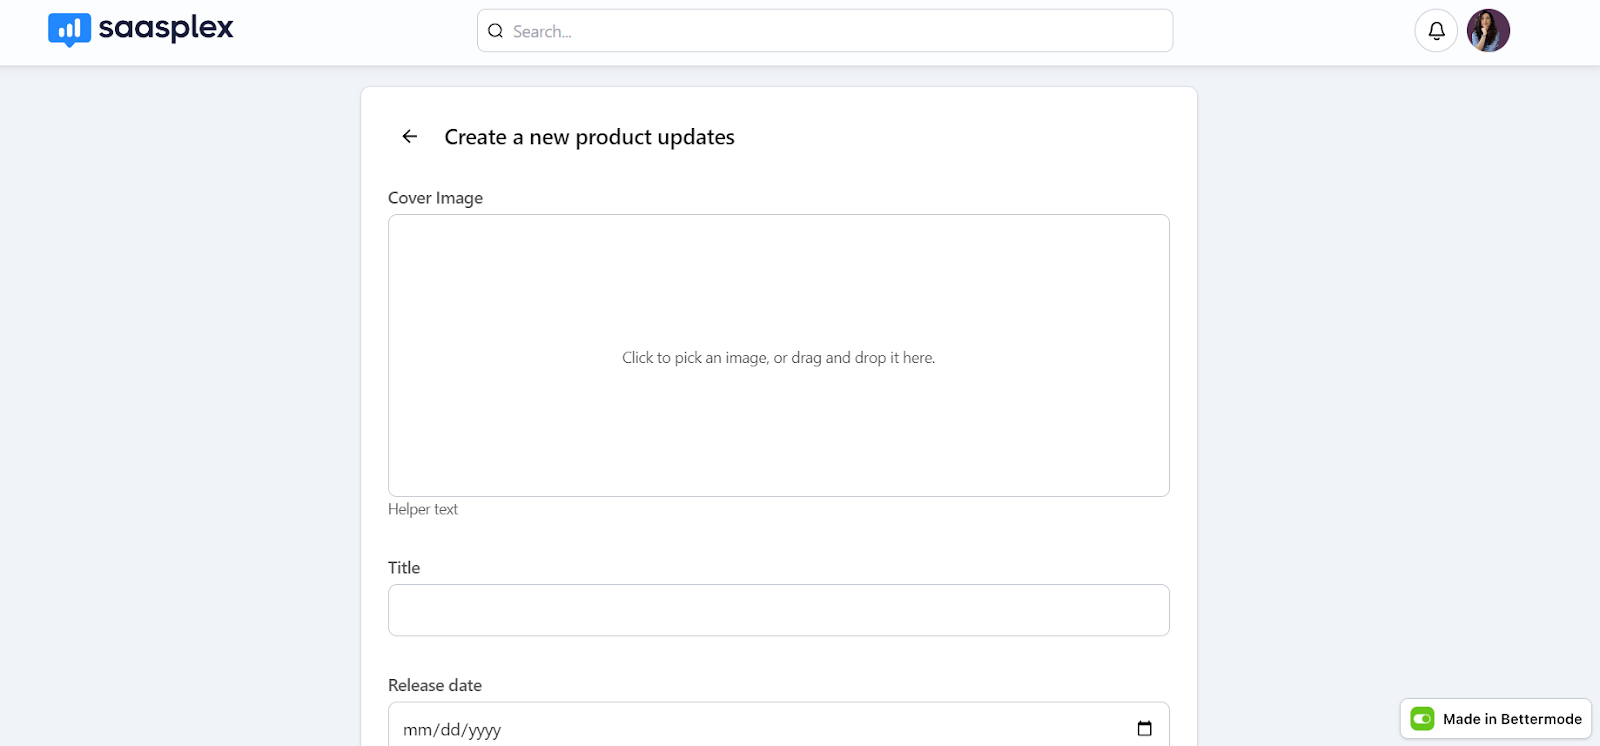
The product updates post type is ideal for sharing the latest developments in your product, company or online community. Product updates are displayed in clear, bite-sized cards. Each update even has a space for a cover image, making them visually appealing and easy to scan.
While only admins and staff can create these posts, everyone in the community can join the conversation.
Step 6: Analyze community performance
Understanding how your community is doing is key to its success. Bettermode's reports and analytics remove the guesswork, giving your community manager valuable insights to make data-driven decisions.
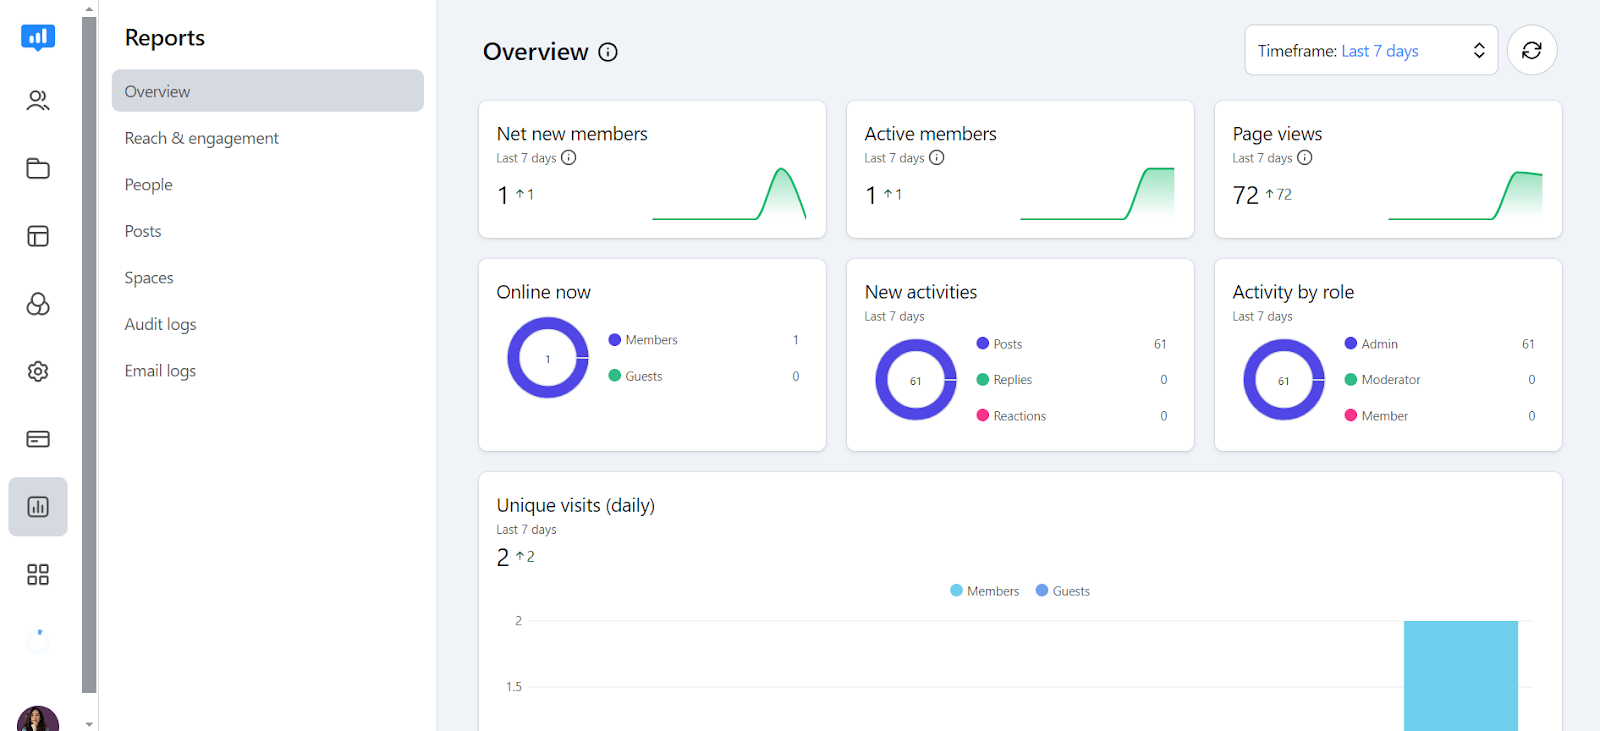
Here, you'll find several options under the Reports section to help you monitor different aspects of your community:
- Overview: Get a quick snapshot of your community's most important metrics.
- Reach & community engagement: Track user activity, visits and how members are interacting with like minded people.
- People: See how your membership is growing and identify your most active members based on their contributions.
- Posts: Discover which posts are generating the most buzz, based on views, replies and reactions within the active community.
- Spaces: Discover which areas of your successful community are most popular. This section showcases your top spaces (categories or sections within your community) based on the number of posts, views and existing members within each space.
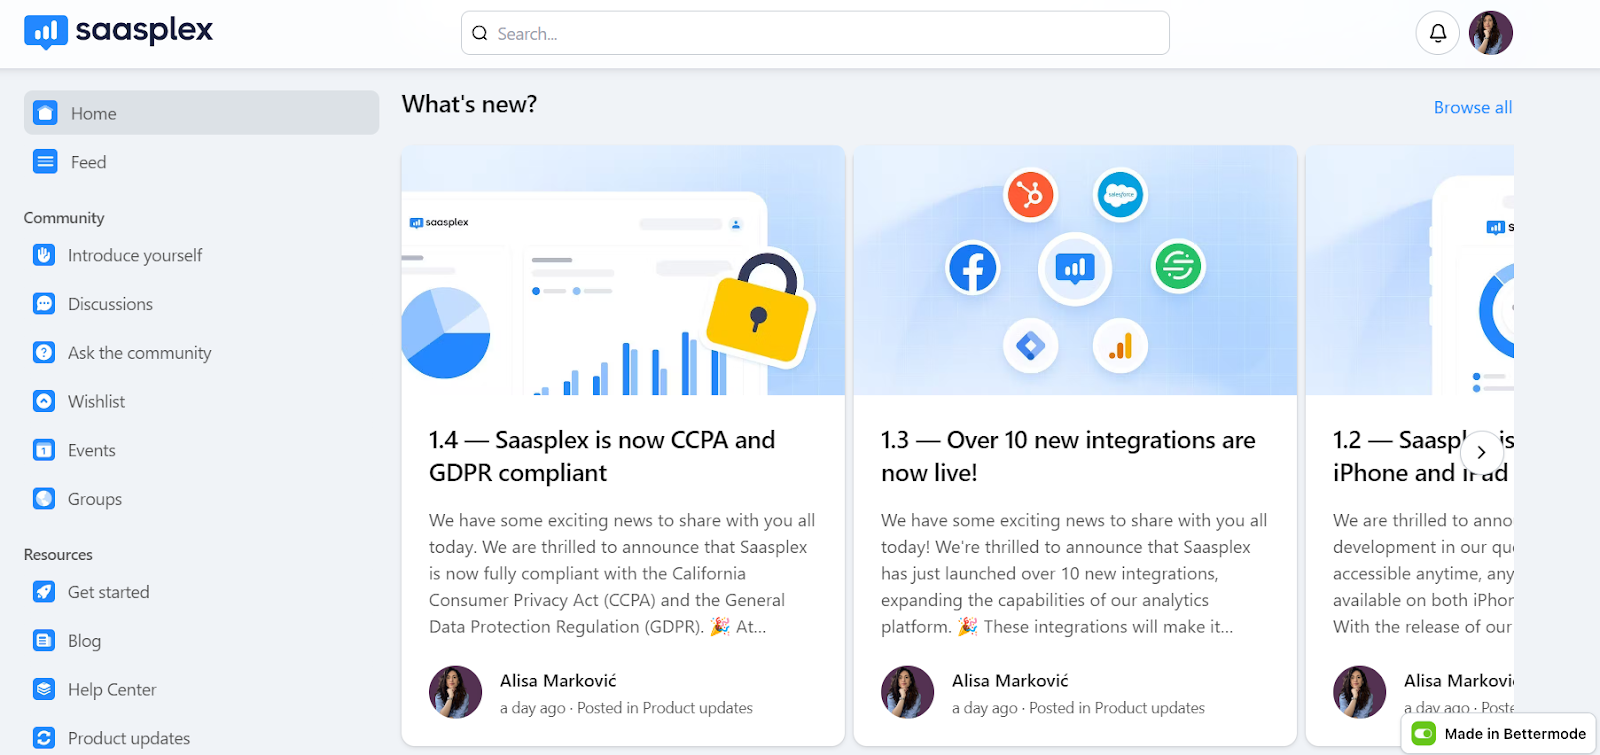
Here’s how your community webpage will look like:
Top 3 examples of online communities
Now that you know what to focus on when building a branded community let's see how other start-ups have built their online communities.
Coursera
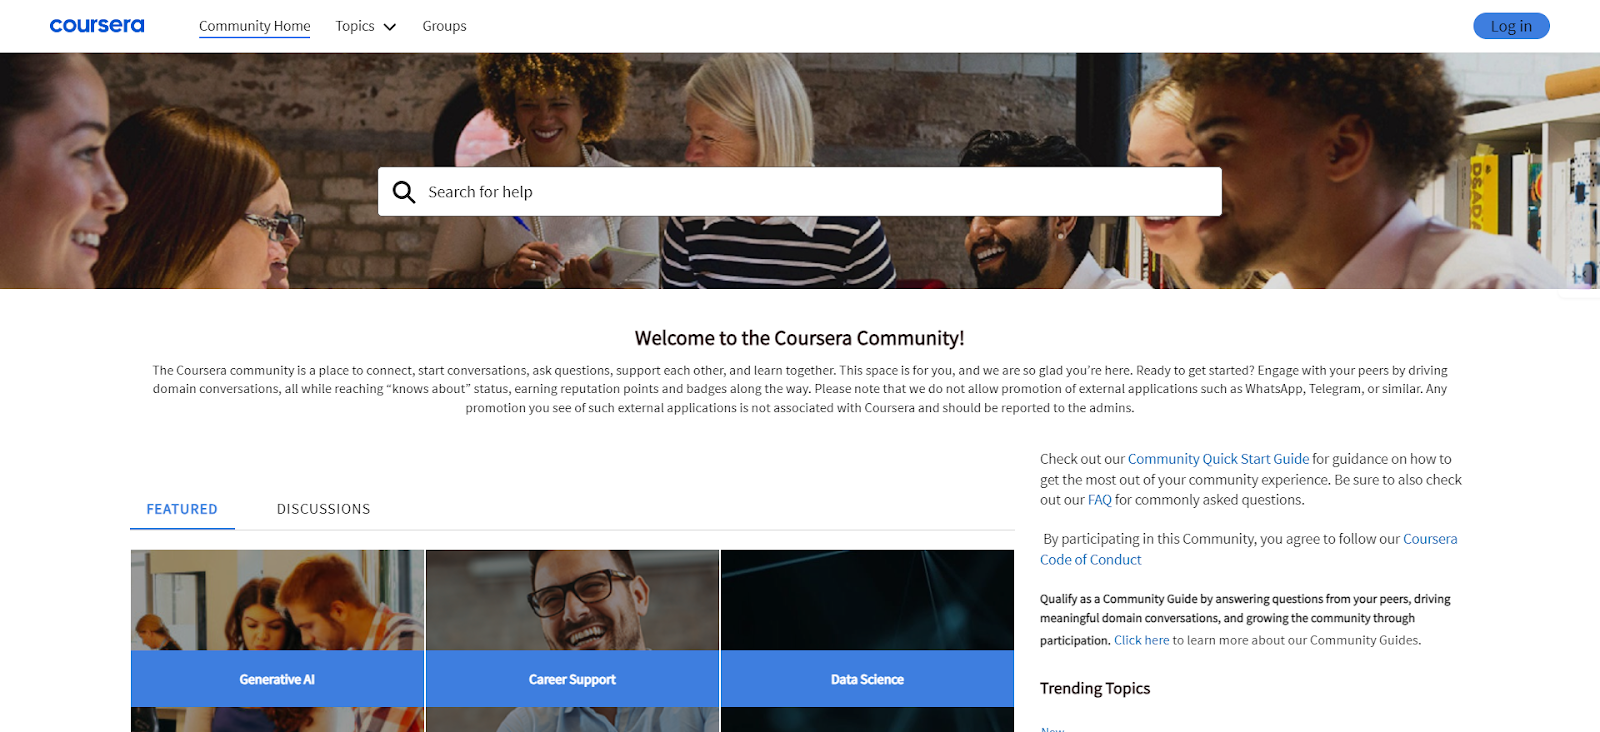
Coursera is a platform that offers online courses, and its community thrives on connection and support. It's one of the best learning communities where members can ask questions, share knowledge and delve into specific topics together.
Coursera's user interface is smooth and intuitive, allowing easy navigation through course forums and discussion groups. The platform's robust search options make finding relevant topics and threads effortless.
Additionally, Coursera's community sections, such as course-specific groups and general interest forums, provide templates that can be customized for different learning environments. By rewarding users with reputation points and community badges, the community organically fosters a sense of accomplishment and belonging.
Runna
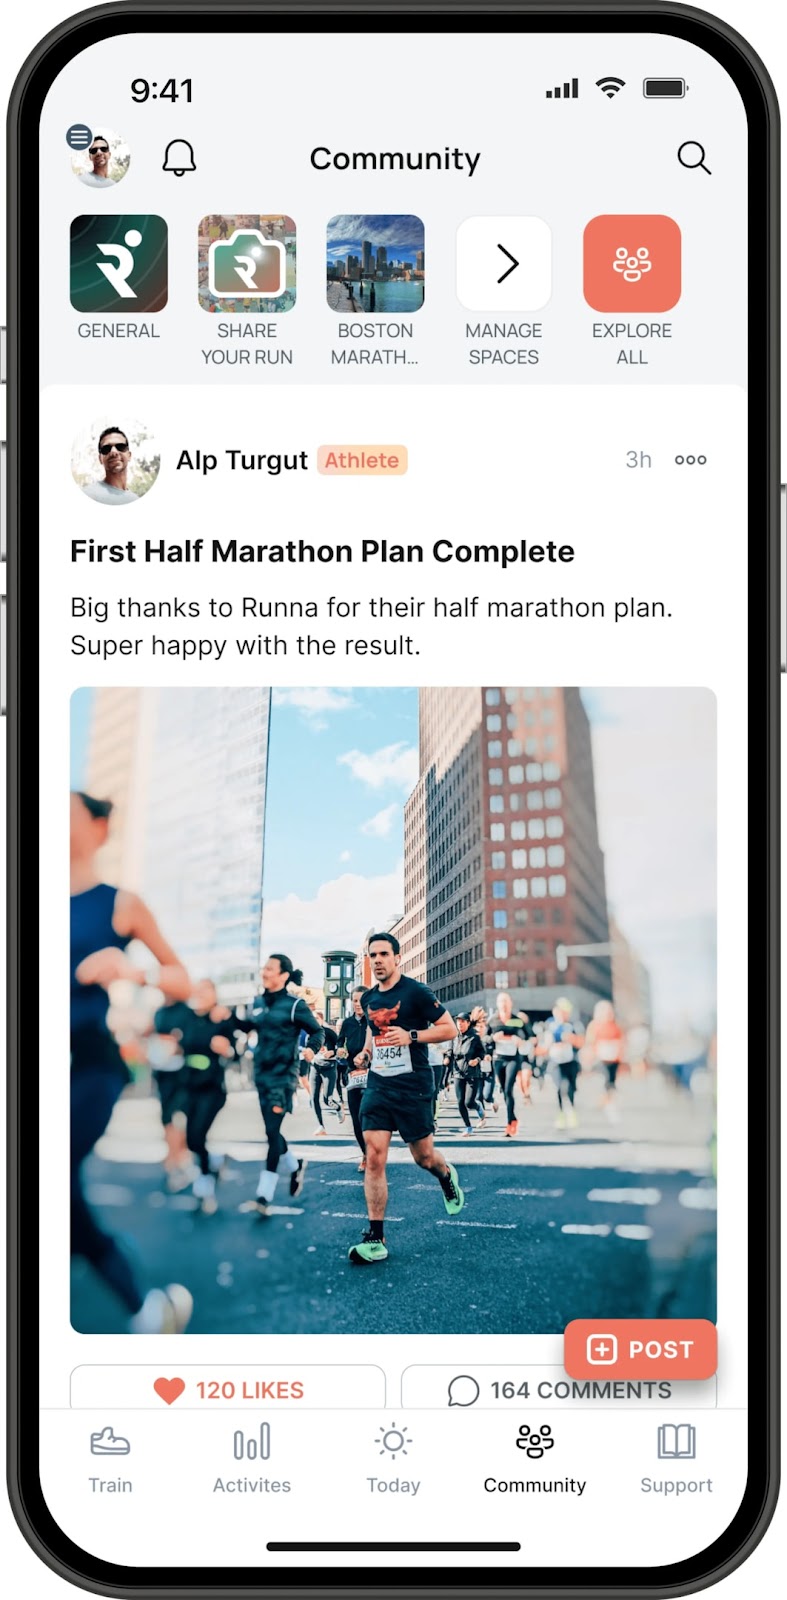
The Runna community offers a supportive environment for runners of all levels, providing motivation, accountability and valuable resources. Members can connect with thousands of runners worldwide, access exclusive discounts on nutrition and apparel, participate in events and competitions and receive support from the coaching team and other professionals.
The interface includes easily navigable sections for training plans, community forums and event registrations. Additionally, the integrated communication tools enable real-time interaction among members, strengthening the sense of community.
Octorate
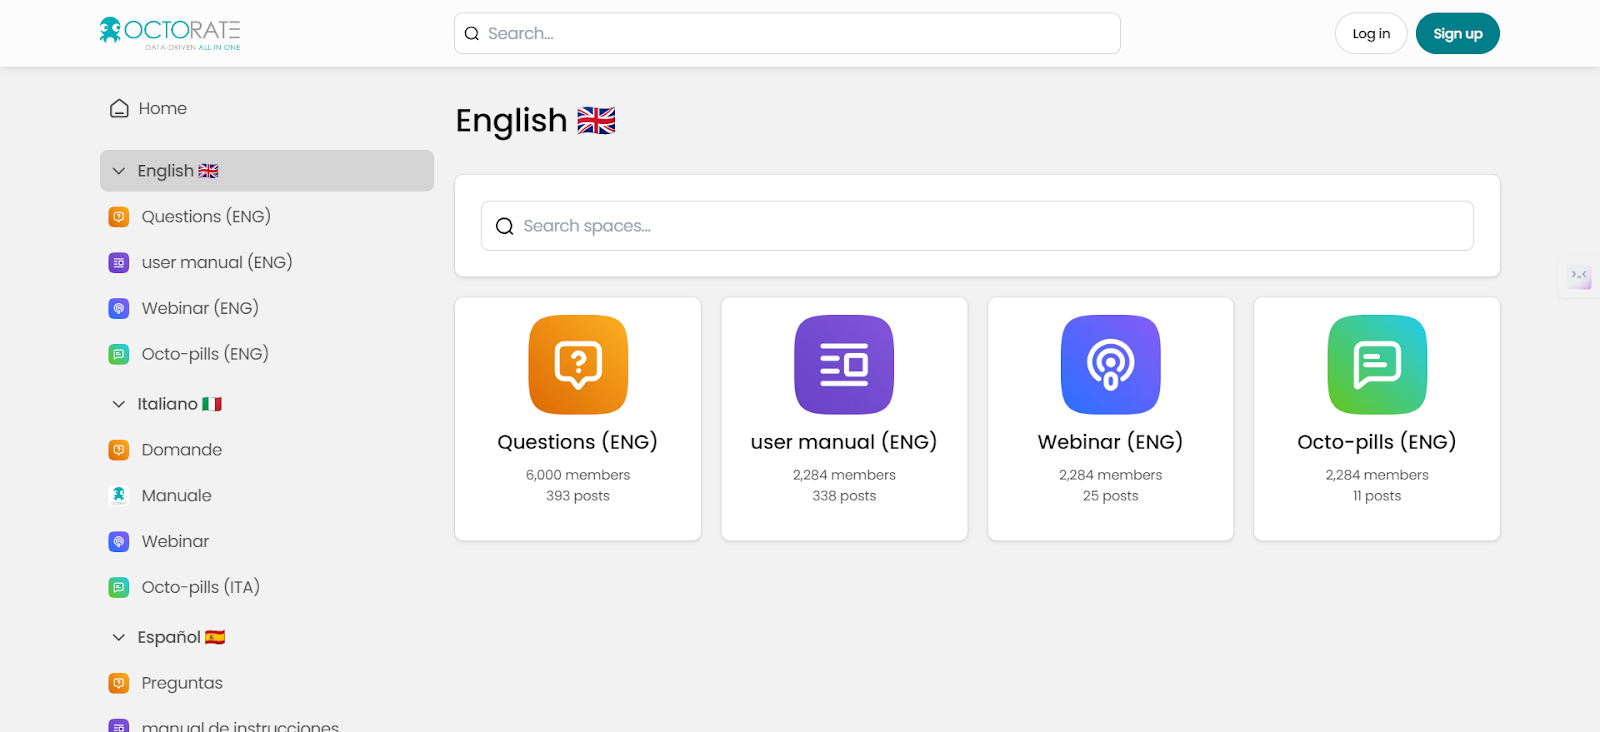
The Octorate community is one of the branded communities that stand out as a model of how to build an online community.They strategically implemented features like Collections, SSO, and a Developer Portal to cultivate a thriving private hub for their customers.
The platform's sleek UI and comprehensive search options enhance the user experience, making it easy for members to navigate and find the information they need. The Collections feature organizes resources effectively, while the Developer Portal provides detailed technical documentation and support.
This centralized space transformed into a rich knowledge base, empowering customers to support one another and significantly improve the efficiency of Octorate's internal support team.
These examples highlight the importance of both community-building strategies and the technical features that facilitate a seamless and engaging user experience.
Conclusion
Creating an online community that connects and empowers your startup or non-profit doesn't have to be a headache. With Bettermode, you get the right tools and a user-friendly platform to simplify the process.
This user-friendly platform offers no-code tools, so even if coding isn't your thing, you can easily create and customize your online community. From creating an account to customizing your community's appearance and content, Bettermode provides a seamless experience every step of the way.
By following these tips and leveraging Bettermode's features, you can build a thriving community that benefits both you and your members.
So why wait? Get started with Bettermode today and build a community that will support and elevate your start-up or non-profit.
FAQs
How can you create a community?
To create a community, start by defining your purpose and audience. Use a no-code tool to build and organize your community platform efficiently. These tools often provide customizable templates, user-friendly interfaces and features like forums, groups and event scheduling.
What are the 4 steps to building a community?
The four main steps to building a community are defining your purpose and audience, choosing the right platform, creating engaging content and fostering connections among members.
What builds a good community?
A good community is built on a strong sense of purpose, active engagement among members, effective communication and a supportive and inclusive environment.


